
Find your way around
Open Media in the dashboard’s left menu. Each kind of file has its own tab (1):
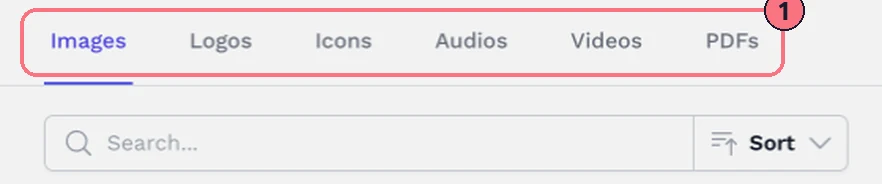
- ImagesPictures for hotspots, popups and Smart Bubbles.
- LogosYour logos, for your tours and brand kits.
- IconsYour own hotspot icons.
- AudiosBackground sound and audio hotspots.
- VideosVideos to play from hotspots.
- PDFsBrochures, floor plans and price lists to open from a hotspot.
Use Search to find a file by name, and Sort to list them New to Old, Old to New, A to Z or Z to A.
Upload files
- Open the tab for the kind of file.
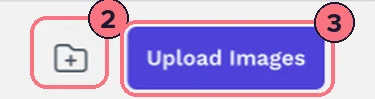
- Choose the upload button at the top right (3), such as Upload Images.
- Pick one or more files. The page tells you how many uploaded, and why any didn’t.
File types and sizes
- Images, Logos, IconsJPG, PNG, GIF, SVG or WebP.
- AudiosMP3.
- VideosMP4 or WebM.
- PDFsPDF.
How big each file can be depends on your plan. On the free trial, videos, sound files and PDFs can be up to 20 MB each, and panorama photos up to 100 MB. If a file is too big, the upload message says the limit for your plan.
Rename, delete and organise
- Rename: choose the pencil under a file and type the new name. (Icons can’t be renamed.)
- Delete: choose the bin under a file. The page asks before deleting.
- Folders: choose the folder button (2) to make a folder. To fill it, choose Select on the files you want, then Add to Folder. Inside a folder, the bin only takes a file out of the folder; the file stays in your library.
Tips
- Name files so you can find them, such as “12 Oak St brochure”, before you have hundreds.
- Make videos small for the web. A short, compressed MP4 loads faster in the tour and stays within your plan’s limit.
Common questions
What files can I upload to the media library?
Images, logos and icons can be JPG, PNG, GIF, SVG or WebP. Sound files must be MP3, videos MP4 or WebM, and documents PDF.
How big can my files be?
It depends on your plan. On the free trial, videos, sound files and PDFs can be up to 20 MB each, and panorama photos up to 100 MB; if a file is too big, the upload message says your plan’s limit.
Can I upload 360° photos as WebP?
No. WebP works for images in the media library, but panoramas must be JPG or PNG. See Image specifications.
Does removing a file from a folder delete it?
No. Inside a folder, the bin only takes the file out of the folder, and it stays in your library. Outside a folder, the bin deletes the file after you confirm.