
Group your tours
- On the Tours page, choose the folder button (1) at the top right, next to Create Tour.
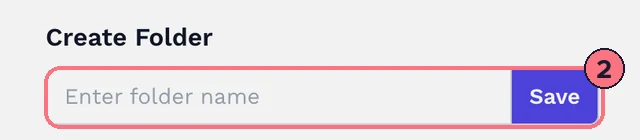
- Type a name and choose Save (2).

To put tours in it:
- Open a tour’s ⋮ menu and choose Multi Select, or press and hold a tour on a phone.
- Tap the tours you want. Each shows Selected.
- Choose Add to Folder in the bar at the bottom, tick the folder, and choose Done.
Your folders appear above your tours. Click one to show only its tours, and click it again to see them all. A tour you create while a folder is open goes straight into it.
Rename, empty or delete a tour folder
- Rename or delete: open the folder and choose the folder button again, now Edit Folder. Delete Folder removes the folder only: its tours stay on your Tours page.
- Take a tour out: inside the folder, open the tour’s ⋮ menu and choose Remove.
Group the panoramas in a tour
- On the Tours page, open the tour’s ⋮ menu and choose Panorama List.
- Choose Create Folder, type a Folder Name and choose Save.
- Hover over a panorama and tick it, or choose its folder icon. Then choose Add to folder in the bar at the bottom and pick the folder.
Folders appear as tabs next to All. Panoramas you upload while a folder is open are added to it.
Inside a folder, the bin on a panorama takes it out of the folder, after you confirm. Edit Folder renames the open folder, and Delete Folder deletes it.
Tips
- Tour folders are just for you; visitors never see them. Panorama folders show up for visitors only with the Listing theme, which groups the thumbnail strip by folder (see Tour settings).
- Team members don’t see the tour folder button; folders belong to the account owner.
Common questions
Does deleting a tour folder delete its tours?
No. Delete Folder on the Tours page removes the folder only; its tours stay on your Tours page.
Can a tour be in more than one folder?
Yes. Add to Folder lists every folder with its own tick box, so you can tick as many as you need.
Can I make a portfolio page from a folder?
Yes. When you create a portfolio, choose the folder under Link to Folder, and the page shows that folder’s public tours.